Tools
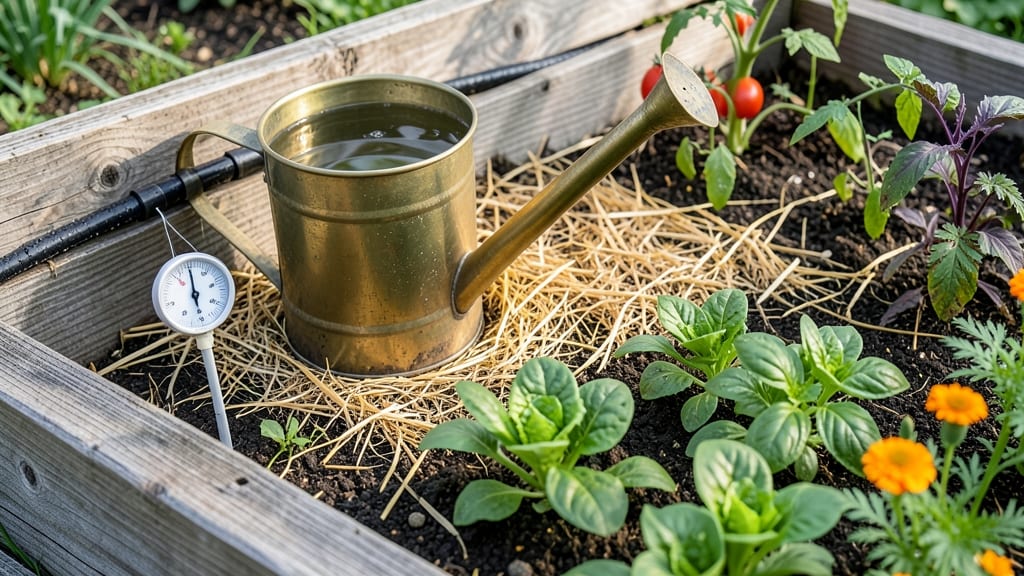
Watering your garden bed properly is the key to keeping 🌱 plants thriving without wasting a drop or drowning roots.
Struggling with uneven water distribution or wasted water in your garden beds? A smart drip irrigation system can transform your gardening game by delivering precise, consistent moisture—saving you time and boosting plant health.
Most gardeners overwater or underwater by accident, thinking more is always better. But the truth is, your garden bed needs a deep soak only when the top inch of soil feels dry, not a light sprinkle every day.
In this guide, I’ll walk you through the best drip irrigation setup, how to adjust for seasonal changes, and the simple tweaks that keep your garden bed perfectly moist without the guesswork.
How to plan a drip irrigation system for maximum garden bed efficiency
A drip irrigation system is a game-changer for garden beds, delivering water directly to roots while minimizing waste. Unlike traditional sprinklers, it ensures even moisture distribution and reduces evaporation. Whether you're growing vegetables, herbs, or flowers, a well-planned system saves time and boosts plant health.
Let’s break down how to design one tailored to your garden’s unique needs.
First, assess your garden’s water requirements. Different plants need varying amounts—tomatoes and peppers thrive with deep, consistent watering, while herbs like basil prefer slightly drier conditions.
Measure your garden bed’s size and map out plant zones to avoid over- or under-watering. This step ensures your system is efficient and customizable for each plant type.
Step-by-Step Guide to Planning Your Drip System
-
Step 1: Calculate Water Needs
Measure your garden bed’s square footage and research plant-specific water requirements. For example, leafy greens need about 1 inch per week, while root vegetables may require 1.5 inches. Adjust for your climate—hotter regions need more frequent watering.
-
Step 2: Choose the Right Tubing
Select 1/4-inch or 1/2-inch tubing based on your garden’s size. 1/4-inch tubing works for small beds, while 1/2-inch tubing is ideal for larger areas. Use flexible poly tubing for easy installation and durability.
-
Step 3: Select Emitters
Pick emitters based on plant types. Micro-sprayers work for broadleaf plants like lettuce, while drip emitters are perfect for tomatoes or peppers. Adjust flow rates—0.5 to 4 gallons per hour (GPH) is typical for most garden beds.
-
Step 4: Zone Your Garden
Group plants with similar water needs into zones. For example, place herbs and flowers in one zone and heavy feeders like corn in another. This allows you to control water flow per zone, optimizing efficiency.
-
Step 5: Install a Timer
Add a mechanical or digital timer to automate watering. Set it to run early morning (4-8 AM) to reduce evaporation and fungal risks. Most timers allow custom schedules for different zones.
-
Step 6: Add Filters and Pressure Regulators
Install a 150-mesh filter to prevent clogs and a pressure regulator to maintain consistent flow. This protects your system and ensures even water distribution across all emitters.
-
Step 7: Test and Adjust
Run a test to check for leaks or uneven watering. Adjust emitter spacing or flow rates as needed. Monitor soil moisture weekly and tweak your system to match your plants’ evolving needs.
One of the biggest advantages of drip irrigation is its ability to customize watering for different plant types. For instance, herbs like rosemary and thyme prefer drier soil, so place their emitters farther apart or use lower flow rates.
Meanwhile, leafy greens like spinach need consistent moisture, so position emitters closer to the base of the plants.
Don’t forget to mulch around your garden beds after installing the system. Mulch helps retain moisture, reducing the need for frequent watering and keeping roots cool. Use organic mulch like straw or wood chips—these also improve soil health over time as they break down.
Seasonal adjustments are key to long-term success. In summer months, increase watering frequency to combat heat stress, while in fall and winter, reduce it to prevent over-saturation. A drip system makes these adjustments easy with its zoned control.
Finally, invest in quality components to avoid frequent repairs. A backflow preventer is a must to protect your system from contamination, and durable tubing will last for years. With the right setup, your drip irrigation system will pay dividends in plant health, water savings, and ease of maintenance.
Ready to transform your garden bed watering? Start small with one section of your garden, test your system, and expand as needed. Your plants—and your water bill—will thank you! 💧🌱
Best drip irrigation components for consistent moisture in garden beds
A well-designed drip irrigation system relies on the right components to deliver precise moisture without waste. The four essential parts—pressure regulators, filters, timers, and emitters—work together to create an efficient setup tailored to your garden bed's needs.
Each component plays a critical role: pressure regulators protect your system from damage, filters prevent clogs, timers automate watering schedules, and emitters control flow to individual plants.
Choosing the wrong part can lead to uneven watering or system failure, so let’s break down the best options for different garden bed sizes and plant types.
📊 Comparison Table: Essential Drip Irrigation Components
| Component | Purpose | Best For | Durability | Compatibility |
|---|---|---|---|---|
| Pressure Regulator | Maintains consistent water pressure (30-60 PSI) | All garden beds, especially sloped areas | 5+ years with proper maintenance | 1/4" or 1/2" tubing systems |
| Mesh Filters | Removes particles down to 70-150 microns | Clay-heavy or sandy soils | Replace every 3-6 months | All emitter types |
| Mechanical Timers | Programs watering cycles (1-24 hours) | Vegetable/herb beds needing precision | 3-5 years with battery backup | All systems with 24V power |
| Drip Emitters | Delivers 0.5-4 GPH per plant | Small plants (herbs) or large (tomatoes) | 3-7 years with proper cleaning | 1/4" or 1/2" tubing |
For small garden beds (under 10 sq ft), prioritize low-flow emitters (0.5-1.5 GPH) and compact timers. Larger beds (20+ sq ft) benefit from adjustable pressure regulators and larger mesh filters to handle higher flow rates without clogging.
Herb gardens thrive with micro-sprinklers (0.5 GPH) placed 6-12 inches from plants, while vegetable beds often need drip emitters (1-2 GPH) spaced 12-18 inches apart. Always match emitter flow rates to your soil type—sandy soils drain faster and may need higher GPH emitters than clay-heavy soils.
Don’t overlook backflow preventers ($10-$20) if your water source connects to a municipal supply. They’re a small investment that protects your system—and your garden—from contamination risks.
Pro tip: Test your setup by placing a clear container under each emitter for 10 minutes. Adjust flow rates until you see consistent drips (1-2 seconds per drop) for optimal absorption.