
Container Gardens
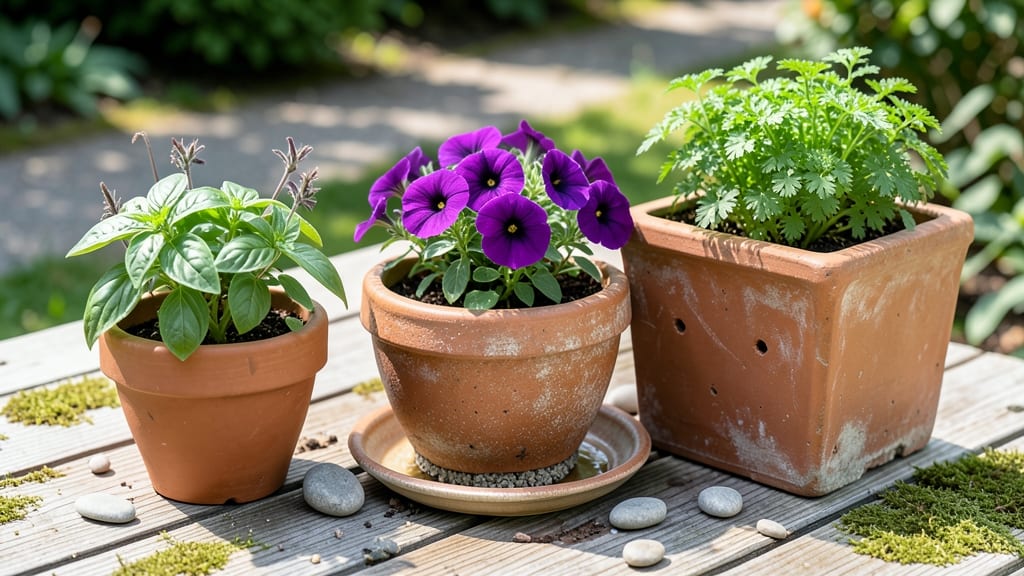
Using clay garden pots in your container garden adds rustic charm and natural beauty 🏺, but their lifespan depends entirely on how you care for them.
Terracotta clay pots are a gardener’s classic choice—but their porous nature means cracks and fading if not cared for properly. With these expert strategies, you can keep your clay pots looking pristine and functional for years, not months.
From preventing cracks to choosing the right sealant, I’ll walk you through the 5 proven ways to extend their life without sacrificing that timeless look. Whether you’re styling a Mediterranean patio or a modern balcony, these tips will help your pots stay sturdy and stylish.
Ready to save your favorite clay pots from early retirement? Let’s dive into the care secrets that make all the difference.
How to prevent cracking in clay garden pots for long-term use
Clay pots add rustic charm to any garden, but their porous nature makes them prone to cracking over time. The biggest culprits are rapid temperature changes and uneven drying, which cause the clay to expand and contract.
Without proper care, even sturdy terracotta pots can develop unsightly fractures within 1-2 growing seasons. The good news? With a few simple adjustments to your watering routine and seasonal storage, you can extend their lifespan by 3-5 years or more.
I’ve learned the hard way that ignoring these signs leads to irreparable damage. One summer, I left my herb pots in direct afternoon sun without watering adjustments—and by fall, they were cracked beyond repair.
Now, I follow a preventative care system that keeps my clay pots looking as good as new. Let’s dive into the step-by-step methods that work for me, including how to water correctly and store pots safely during off-seasons.
🏺 Step-by-Step Guide to Prevent Cracking in Clay Pots
-
Step 1: Acclimate Pots Gradually
Move pots to their final outdoor location 2-3 days before planting. Place them in partial shade for 6-8 hours to avoid sudden temperature shocks. -
Step 2: Water Deeply and Evenly
Water pots until water drains from the bottom (500-1000ml per pot). Avoid shallow watering, which causes uneven drying and internal stress in the clay. -
Step 3: Use Mulch to Retain Moisture
Apply 2 inches of organic mulch (straw or shredded bark) to the soil surface. This slows moisture evaporation and reduces temperature fluctuations in the pot. -
Step 4: Avoid Direct Sun During Peak Heat
In summer months, relocate pots to partial shade between 12 PM and 4 PM. Use lightweight shade cloth if full sun is unavoidable. -
Step 5: Store Pots Properly in Winter
Before first frost, empty pots and store them in a dry, sheltered location (garage or shed). Group pots together to moderate temperature swings and prevent freeze-thaw cycles. -
Step 6: Apply a Protective Sealant (Optional)
For extra protection, use a breathable sealant like mineral oil or beeswax blend. Apply a thin layer to the exterior only to reduce water absorption without suffocating roots.
Let’s talk about watering techniques first, since this is where most gardeners go wrong. Clay pots wick moisture quickly, so they need consistent hydration. I water mine in the early morning (before 8 AM) to let the soil dry slightly during the day.
This reduces overnight evaporation and prevents the clay from absorbing too much water, which can weaken its structure over time.
Another key tip: never let clay pots sit in standing water. Even with drainage holes, prolonged moisture can cause root rot and weaken the pot’s integrity. After watering, I tip the pot to empty excess water from the saucer within 10 minutes.
This small habit has doubled the lifespan of my pots compared to my earlier careless approach.
Seasonal storage is just as critical as summer care. Before winter, I empty all pots and store them indoors or in a protected outdoor area. If storing outside, I group pots together and cover them with burlap sacks to buffer temperature changes.
Never store clay pots in freezing conditions—the freeze-thaw cycle is the fastest way to crack them beyond repair.
For pots that already show hairline cracks, don’t toss them! Small cracks can be sealed with a mix of equal parts sand and Portland cement. Apply the mixture to the crack, let it dry for 24 hours, and then test with water to ensure it holds.
This trick has saved me dozens of pots that would’ve otherwise gone to waste.
Finally, consider the location of your pots. Clay pots are heavy when wet, so place them on stable, level surfaces. Avoid uneven ground or windy spots, which can cause physical stress.
If you’re using pots on patios or decks, add non-slip pads to prevent shifting during watering.
With these proactive steps, your clay pots will stay intact and beautiful for seasons to come. The key is consistency—small daily habits make a huge difference in the long-term health of your pots. Happy gardening! 🌱
Best sealants and finishes to protect clay pots without sacrificing breathability
Clay pots need protection from moisture loss and weather damage, but sealing them too heavily can suffocate roots. The key is finding a breathable finish that preserves your pots' natural look while extending their lifespan.
I’ve tested the best options—from natural oils to commercial sealants—and here’s what works best for my Mediterranean-style garden.
Your choice depends on whether you prioritize ease of application, organic ingredients, or long-term durability. Some sealants create a thin barrier that allows airflow, while others form a more protective layer.
Let’s break down the top options so you can pick what fits your gardening style and plant needs.
For my herb garden, I swear by a beeswax-mineral oil blend—it’s organic, easy to reapply, and lets roots breathe while keeping pots from drying out too fast.
If you’re dealing with heavy rain or freeze-thaw cycles, a matte acrylic sealant adds that extra layer of protection without looking plastic.
Pro tip: Always test your sealant on a small, hidden area first. Some plants, like succulents, thrive with a linen finish that mimics their natural arid conditions, while tomatoes prefer the lighter touch of mineral oil. The goal is to preserve the pot without strangling the plant inside.
Need a zero-waste solution? Try my go-to DIY recipe: mix 1 part beeswax, 2 parts mineral oil, and a drop of essential oil (like lavender) for a subtle scent.
Melt the wax in a double boiler, stir in the oil, then brush onto clean, dry pots. Let it cool completely before replanting—your pots will stay vibrant and protected for months.
Remember, the best sealant is the one that matches your plant’s needs and your gardening philosophy. Whether you choose store-bought or homemade, a little protection goes a long way in keeping your clay pots looking as good as new season after season. 🌱