
Picking
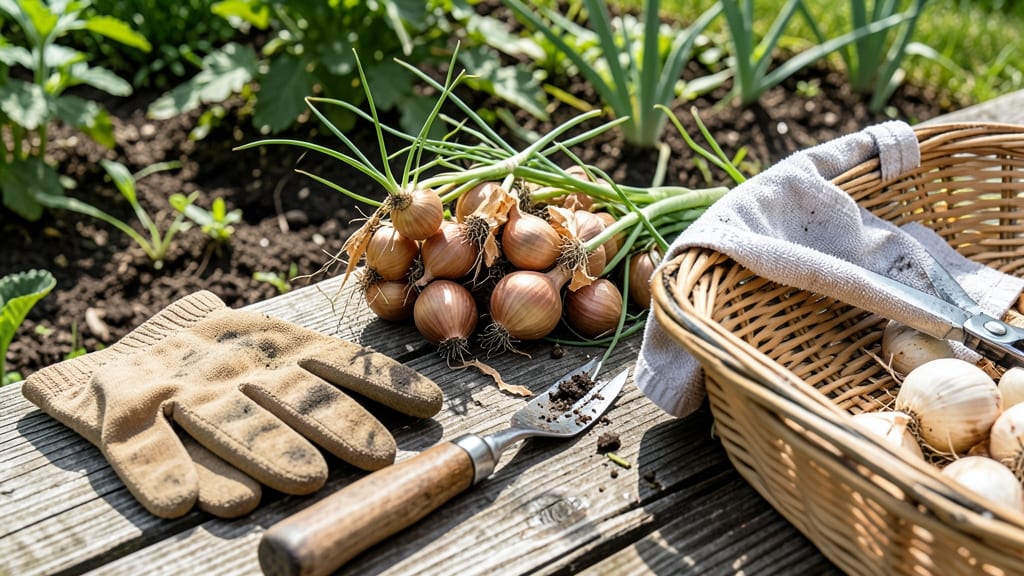
Harvesting shallots from your garden at the right time turns a handful of cloves into a bounty of flavorful bulbs 🧅 — but miss the window, and you’ll end up with shriveled scraps or wasted effort.
If you’ve ever dug up shallots only to find them small and soft, you know how frustrating it is. The difference between a great harvest and a disappointing one often comes down to timing and technique.
In this guide, I’ll walk you through the exact signs to look for—yellowing leaves, firm bulbs, and dry skin—and the step-by-step method to pull them without damage. You’ll also learn how to cure and store them for long-term use, plus the common mistakes that ruin yields.
By the end, you’ll know exactly when to harvest for maximum flavor and size, so you can enjoy homegrown shallots all year long.


When to harvest shallots: key signs for perfect timing
Knowing when to harvest shallots is the difference between plump, flavorful bulbs and small, underdeveloped harvests. Unlike onions, shallots mature over 90-120 days, and their harvest window is short. Miss it, and you risk losing your entire crop to bolting or rot.
The key is watching for three critical signs that tell you it's time to dig—leaf color, bulb firmness, and skin texture.
Most gardeners in USDA Zones 6-9 harvest shallots between mid-July and early August, but your exact timing depends on your climate. In cooler regions, aim for late summer when daytime temps stay above 70°F.
In warmer zones, you might harvest as early as June if your spring was mild. The goal is to pull them before the first frost, which can damage the bulbs.
Here’s what to look for to know your shallots are ready:
The tops will flop over and dry out, signaling the bulb has finished growing. If leaves stay green and upright, wait 1-2 more weeks.
Gently dig up a test bulb—if it’s smaller than a golf ball (1 inch), it’s not ready. Over-sized bulbs (>2 inches) may split during harvest.
Run your fingers over the bulb—it should feel rough and dry, not slick or moist. Wet skin means rot risk after harvest.
The stem connecting bulb to leaves will tighten, pulling nutrients into the bulb. This is your final cue to harvest before flavor declines.
If you’re growing shallots in containers or raised beds, check these signs every 5-7 days starting at 90 days after planting. Container-grown shallots often mature faster due to warmer soil temps. In ground plantings, monitor the outer rows first—they tend to ripen slightly earlier than center plants.
One common mistake is waiting too long. If you see flower stalks (scape) emerging from the center, your shallots have bolted, and the bulbs will be small and pungent.
Bolted shallots are still edible but lack the sweet, mild flavor of properly timed harvests. To prevent bolting, avoid over-fertilizing with nitrogen late in the season.
For cooler climates (Zones 3-5), extend your harvest window by planting shallot sets in early spring (March-April) and using row covers to protect from early frosts. In hot climates (Zones 10+), plant in fall (September-October) for a winter harvest, as summer heat can cause bolting.
Always aim to harvest before daytime temps drop below 60°F.
Pro tip: Mark your planting date on a garden journal. Shallots typically take 105 days to mature, so count backward from your first frost date to schedule your harvest. For example, if frost hits October 15, harvest by mid-September to avoid cold damage.
Once you’ve confirmed all four signs, it’s time to harvest. Use a fork or hand trowel to gently loosen the soil around the bulbs—never pull them by the leaves, which can tear the skin. Handle them carefully to avoid bruising, as damaged shallots spoil faster during storage.
🌱
Step-by-step guide to harvesting shallots without damaging bulbs
Now that you’ve spotted the perfect harvest signs—yellowing foliage and firm bulbs—it’s time to pull your shallots with care. The right tools and technique make all the difference between intact bulbs and bruised messes.
I’ll show you how to dig, handle, and cure them properly so you can store them for months to come.
Start with the right harvesting tools: a sharp garden fork, clean pruners, and a basket or bucket to collect bulbs. Avoid gloves if possible—they can trap moisture and cause rot.
Work on a dry, sunny day when the soil is slightly damp but not soggy, ideally in the morning when temperatures are cooler.
How to Harvest Shallots Safely
-
Step 1: Loosen the Soil
Use a garden fork to gently pry around the base of the plant, inserting it 2-3 inches deep to avoid piercing bulbs. Work in a circular motion to free roots without tearing foliage. -
Step 2: Lift the Bulbs
Grasp the stem base and pull upward with a steady motion. Resist the urge to twist—this can crack bulbs. If a bulb resists, use the fork to free stubborn roots gently. -
Step 3: Shake Off Soil
Tap bulbs lightly against each other to remove loose dirt, but avoid rubbing to prevent skin damage. Let them air-dry for 10-15 minutes in the shade to harden the skin slightly. -
Step 4: Trim the Foliage
Use clean pruners to cut stems back to 1-2 inches above the bulb. Leave longer stems, and they’ll draw moisture from the bulb during curing. -
Step 5: Cure the Bulbs
Spread shallots in a single layer on a mesh screen or wire rack in a dry, shaded area with good airflow. Cure for 2-3 weeks until the outer skin turns papery and dry. -
Step 6: Store Properly
Once cured, store bulbs in a cool, dark place (50-60°F) with low humidity. Braid stems together or place in a paper bag to prevent moisture buildup.
After harvesting, check for any damaged or soft bulbs—these won’t store well. Discard any with squishy spots or mold, as they’ll spoil others during storage. For the rest, proper curing is key: a dry, well-ventilated space prevents rot and extends shelf life to 6-8 months.
If your shallots are small but firm, you can replant them the following spring—they’ll often regrow into larger bulbs. Just store them in a cool, dry place until planting season. For best results, avoid washing bulbs until you’re ready to use them—moisture speeds up spoilage.
One final tip: Harvest shallots in stages if you have a large patch. Pull a few bulbs at a time every 2-3 weeks for a continuous supply. This also prevents overcrowding, which can lead to smaller, underdeveloped bulbs.